
Knowledge Centre
How to install resin bound stone
How to Install Resin Bound Stone – A Step-by-Step Guide
A professionally installed resin bound surface is attractive, durable and designed to last for many years. Whether you’re installing a garden path, driveway or commercial project, following the correct installation procedure is essential to achieve a smooth, seamless finish and long-term performance.
This guide explains the key stages of a successful resin bound installation and highlights the tools and techniques used by professional installers.
Before You Start
A resin bound system should only be installed onto a sound, stable and properly prepared base. Suitable substrates include:
- Permeable asphalt
- Concrete (primed where required)
- Existing asphalt in good condition
- Resin-bound permeable bases
The surface must be:
- Clean
- Dry
- Free from dust and contamination
- Structurally sound
- Properly edged
Never install onto loose gravel, soil or unstable surfaces.
Step 1 – Prepare Your Materials
Before mixing, ensure all materials are ready.
A typical resin bound mix consists of:
- 100kg kiln-dried decorative aggregate
- 7.5kg UV-stable polyurethane resin
- Kiln-dried sand (where required by the selected blend)
Because polyurethane resin begins curing as soon as Parts A and B are mixed, all materials, tools and installers should be ready before starting.
Step 2 – Use a Forced Action Mixer
This is the most important part of the installation.
A forced action mixer is essential for producing a consistent resin bound mix. Unlike standard drum or cement mixers, a forced action mixer blends the resin and aggregates thoroughly without damaging the stone or leaving dry pockets.
Using the wrong type of mixer is one of the most common causes of installation failure.
A professional forced action mixer ensures:
- Even resin distribution
- Consistent colour
- Maximum strength
- Reduced resin wastage
- Better workability
Step 3 – Follow the Correct Mixing Times
Always follow the recommended mixing procedure for your resin system.
As a general guide:
- Pre-mix Part A if required.
- Add Part B and mix the resin thoroughly.
- Pour the mixed resin into the forced action mixer.
- Add the decorative aggregates.
- Continue mixing for the manufacturer’s recommended time until every stone is evenly coated.
Do not under-mix or over-mix.
Under-mixing can leave dry aggregates and weak areas, while excessive mixing may shorten the working time of the resin.
Maintaining consistent mixing times for every batch is one of the keys to achieving a uniform finish across the entire installation.
Step 4 – Lay the Material
Empty the mixed resin bound stone onto the prepared surface and roughly spread it using a spazzle, screed bar or rake to the required thickness.
Work in manageable sections and maintain a continuous installation to avoid visible joins between batches.
Step 5 – Finish the Surface
The final finish depends on the size of the project.
Small Projects & DIY Installations
For patios, garden paths or smaller driveways, a stainless steel finishing trowel is usually all that’s required to compact and smooth the surface.
Using a clean trowel and applying light, even pressure will produce an attractive, seamless finish.
Larger Driveways & Commercial Projects
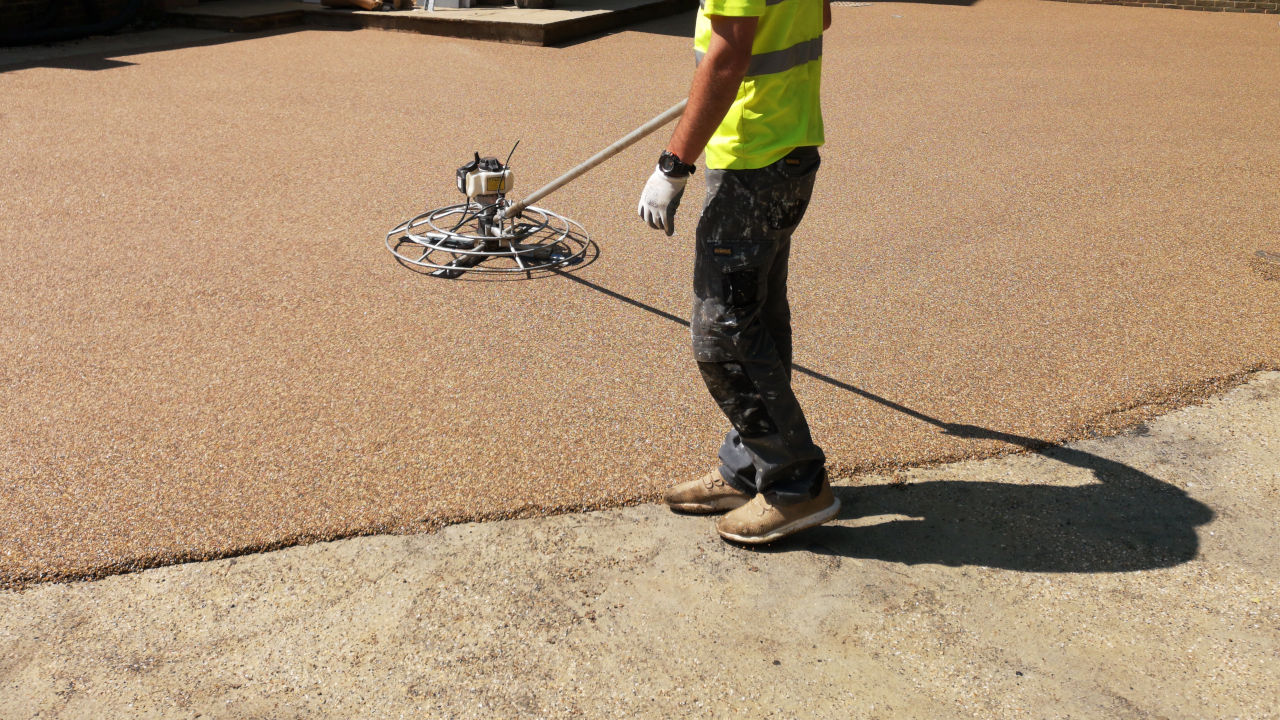
Professional installers often use specialist equipment to increase productivity and improve consistency.
These include:
- Resin bound power trowels
- Roller systems
- Specialist finishing tools
One of the most effective options is The Wand™ Power Trowel, designed and developed by Advanced Resin Supplies in Somerset specifically for resin bound surfacing.
The Wand helps installers:
- Produce a smoother, more consistent finish
- Reduce installation time
- Minimise installer fatigue
- Improve productivity on larger projects
- Deliver consistent results across large commercial areas
While not essential for smaller installations, power trowels have become the preferred choice for many professional contractors carrying out resin bound installations every day.
Step 6 – Allow the Surface to Cure
Protect the newly installed surface until it has fully cured.
Curing times vary depending on:
- Air temperature
- Humidity
- Resin type
- Catalyst system (if used)
Avoid pedestrian or vehicle traffic until the surface has reached the recommended cure time.
Common Installation Mistakes
Many resin bound failures can be traced back to a few avoidable mistakes:
- Using a drum or cement mixer instead of a forced action mixer
- Mixing for inconsistent lengths of time
- Installing onto damp or contaminated substrates
- Poor resin-to-aggregate ratios
- Insufficient compaction during finishing
- Working outside the recommended temperature range
- Leaving excessive delays between batches
Following the correct installation procedure will significantly improve the appearance and durability of the finished surface.


