
Knowledge Centre
Essential Materials for a Resin Bound Driveway: The Complete Guide
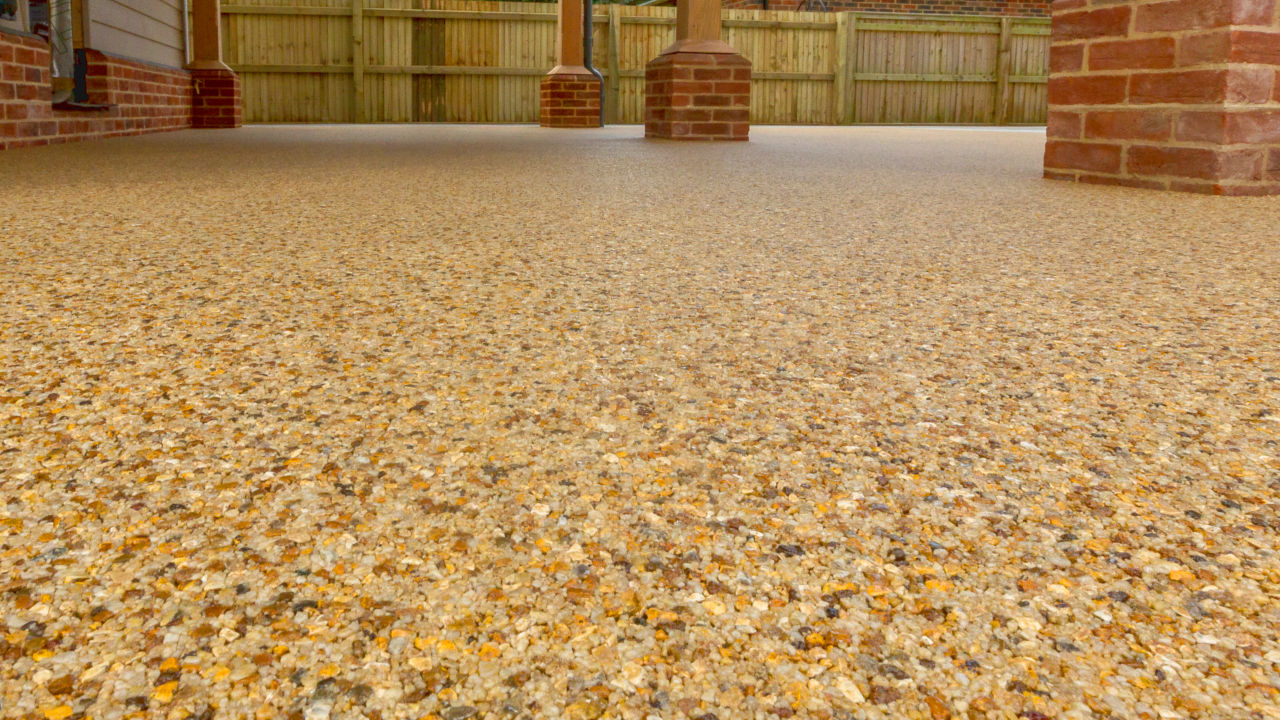
Resin bound driveways have become one of the most popular surfacing choices in the UK — and for good reason. They’re permeable, SUDS-compliant, low-maintenance, and available in dozens of colour blends that suit anything from a modern new-build to a period property. But a resin bound surface is only as good as the materials and tools used to install it.
Whether you’re a contractor quoting your next job or a confident DIYer planning a weekend project, here’s exactly what you need — and why each material matters.
1. Resin Bound Aggregates
The aggregate is the visible, decorative layer of the driveway, and it’s what gives a resin bound surface its character. Natural stone aggregates are washed, kiln-dried and graded before being blended into a resin bound mix, so the finished surface is smooth underfoot, permeable to rainwater, and resistant to weeds.
Colour choice matters more than people expect. Lighter blends such as a natural tan or summer pearl mix reflect heat and suit traditional brick homes, while darker, flecked blends can lift a contemporary grey render. Warmer tones with a pink or rose fleck are popular for country properties looking for a softer, more decorative finish. Buying pre-blended resin bound kits — resin and aggregate matched and measured together — takes the guesswork out of mixing ratios and helps guarantee a consistent colour across the whole driveway.
What to look for: SUDS compliance, UV-stable colour (so it won’t fade), and a supplier that can advise on the right aggregate size for vehicular vs. pedestrian traffic.
2. UV-Stable Resin Binder
The resin is what holds the aggregate together and bonds it to the sub-base. Quality matters enormously here — a cheap, non-UV-stable resin will yellow within a couple of summers, and the whole driveway will need to be redone. A proper UV-stable resin system keeps the aggregate’s original colour for the life of the installation, which with correct installation and maintenance can be 10–20 years, and up to 25 years with proper care.
Most systems are supplied as a two-part mix (resin + hardener) designed to be combined with the aggregate in a forced action mixer on site, in carefully measured ratios — which is why accurate mixing equipment is just as important as the resin itself.
3. Sub-Base Preparation
No resin bound system will perform well over a poor sub-base. Before any aggregate goes down, the base layer — typically a compacted, permeable sub-base such as Type 3 stone, or an existing sound tarmac or concrete base — needs to be clean, structurally sound, and free of standing water. Any cracks or movement in the base will eventually telegraph through to the resin bound surface above it, so this stage is worth getting right rather than rushing.
4. Mixing & Laying Equipment
This is where a lot of first-time installers underestimate the job. Hand-mixing resin and aggregate is slow, inconsistent, and hard on the body — proper equipment pays for itself on the very first driveway.
- Forced action mixer – blends the resin and aggregate evenly and quickly, which is critical for colour consistency across a large driveway. A robust, well-built mixer with a long working life is worth the investment over a domestic cement mixer, which isn’t designed for the density of a resin bound mix.
- Power trowel – used to screed and compact the mixed material to an even depth (typically 15–20mm) and give the surface its characteristic smooth, level finish.
- Square rake – for spreading and levelling the mixed aggregate evenly across the sub-base before trowelling, especially useful on larger driveways where consistent depth matters.
Together, this equipment is what separates a professional-looking, durable finish from an uneven, patchy one.
5. Edging, Trims & Accessories
A resin bound driveway needs a firm edge to contain the material and give clean, defined lines — without it, the aggregate can migrate over time. Aluminium edging trim is the standard choice: it’s rustproof, discreet once installed, and provides a solid restraint along borders, planters and pathways.
Beyond edging, small accessories make a noticeable difference to the finished job: stencils for adding house numbers, logos or decorative borders are a popular way for both homeowners and driveway contractors to add a personal or branded touch to the finished surface.
6. Aftercare
A resin bound driveway is low-maintenance, but not zero-maintenance. Regular hosing down (a fan-setting nozzle and a stiff brush is normally all that’s needed) keeps the surface looking new and helps preserve its permeability. Avoiding harsh chemical cleaners protects the UV-stable resin coating and keeps the colour true for longer.
Frequently Asked Questions
How much aggregate do I need per m²?
This depends on the recommended depth (usually 15–20mm) and the specific aggregate blend — porosity and texture of the sub-base can also affect how much material is needed, so it’s worth asking your supplier to calculate coverage for your specific project rather than estimating.
Can I lay a resin bound driveway myself?
Yes, with the right tools and a properly prepared sub-base — many trade customers started as first-time DIY installers. Training and product support are available for anyone tackling their first project.
Do I need planning permission for a resin bound driveway?
Because resin bound systems are permeable and SUDS-compliant, they generally don’t require planning permission in the way a solid, non-permeable driveway might — but it’s always worth checking with your local council for your specific property.
Ready to start your project? Browse our full range of resin bound aggregates, forced action mixers and tools, and driveway edging accessories — or get in touch with our team for advice on the right materials for your driveway.


